
USPTO Patent Drawing Rules 2026: 7 Common Mistakes That Delay Filings
Why do USPTO drawings get rejected? 7 common 37 CFR 1.84 mistakes that trigger Office Actions, plus a free high-speed AI workflow to fix them. 2026 guide.
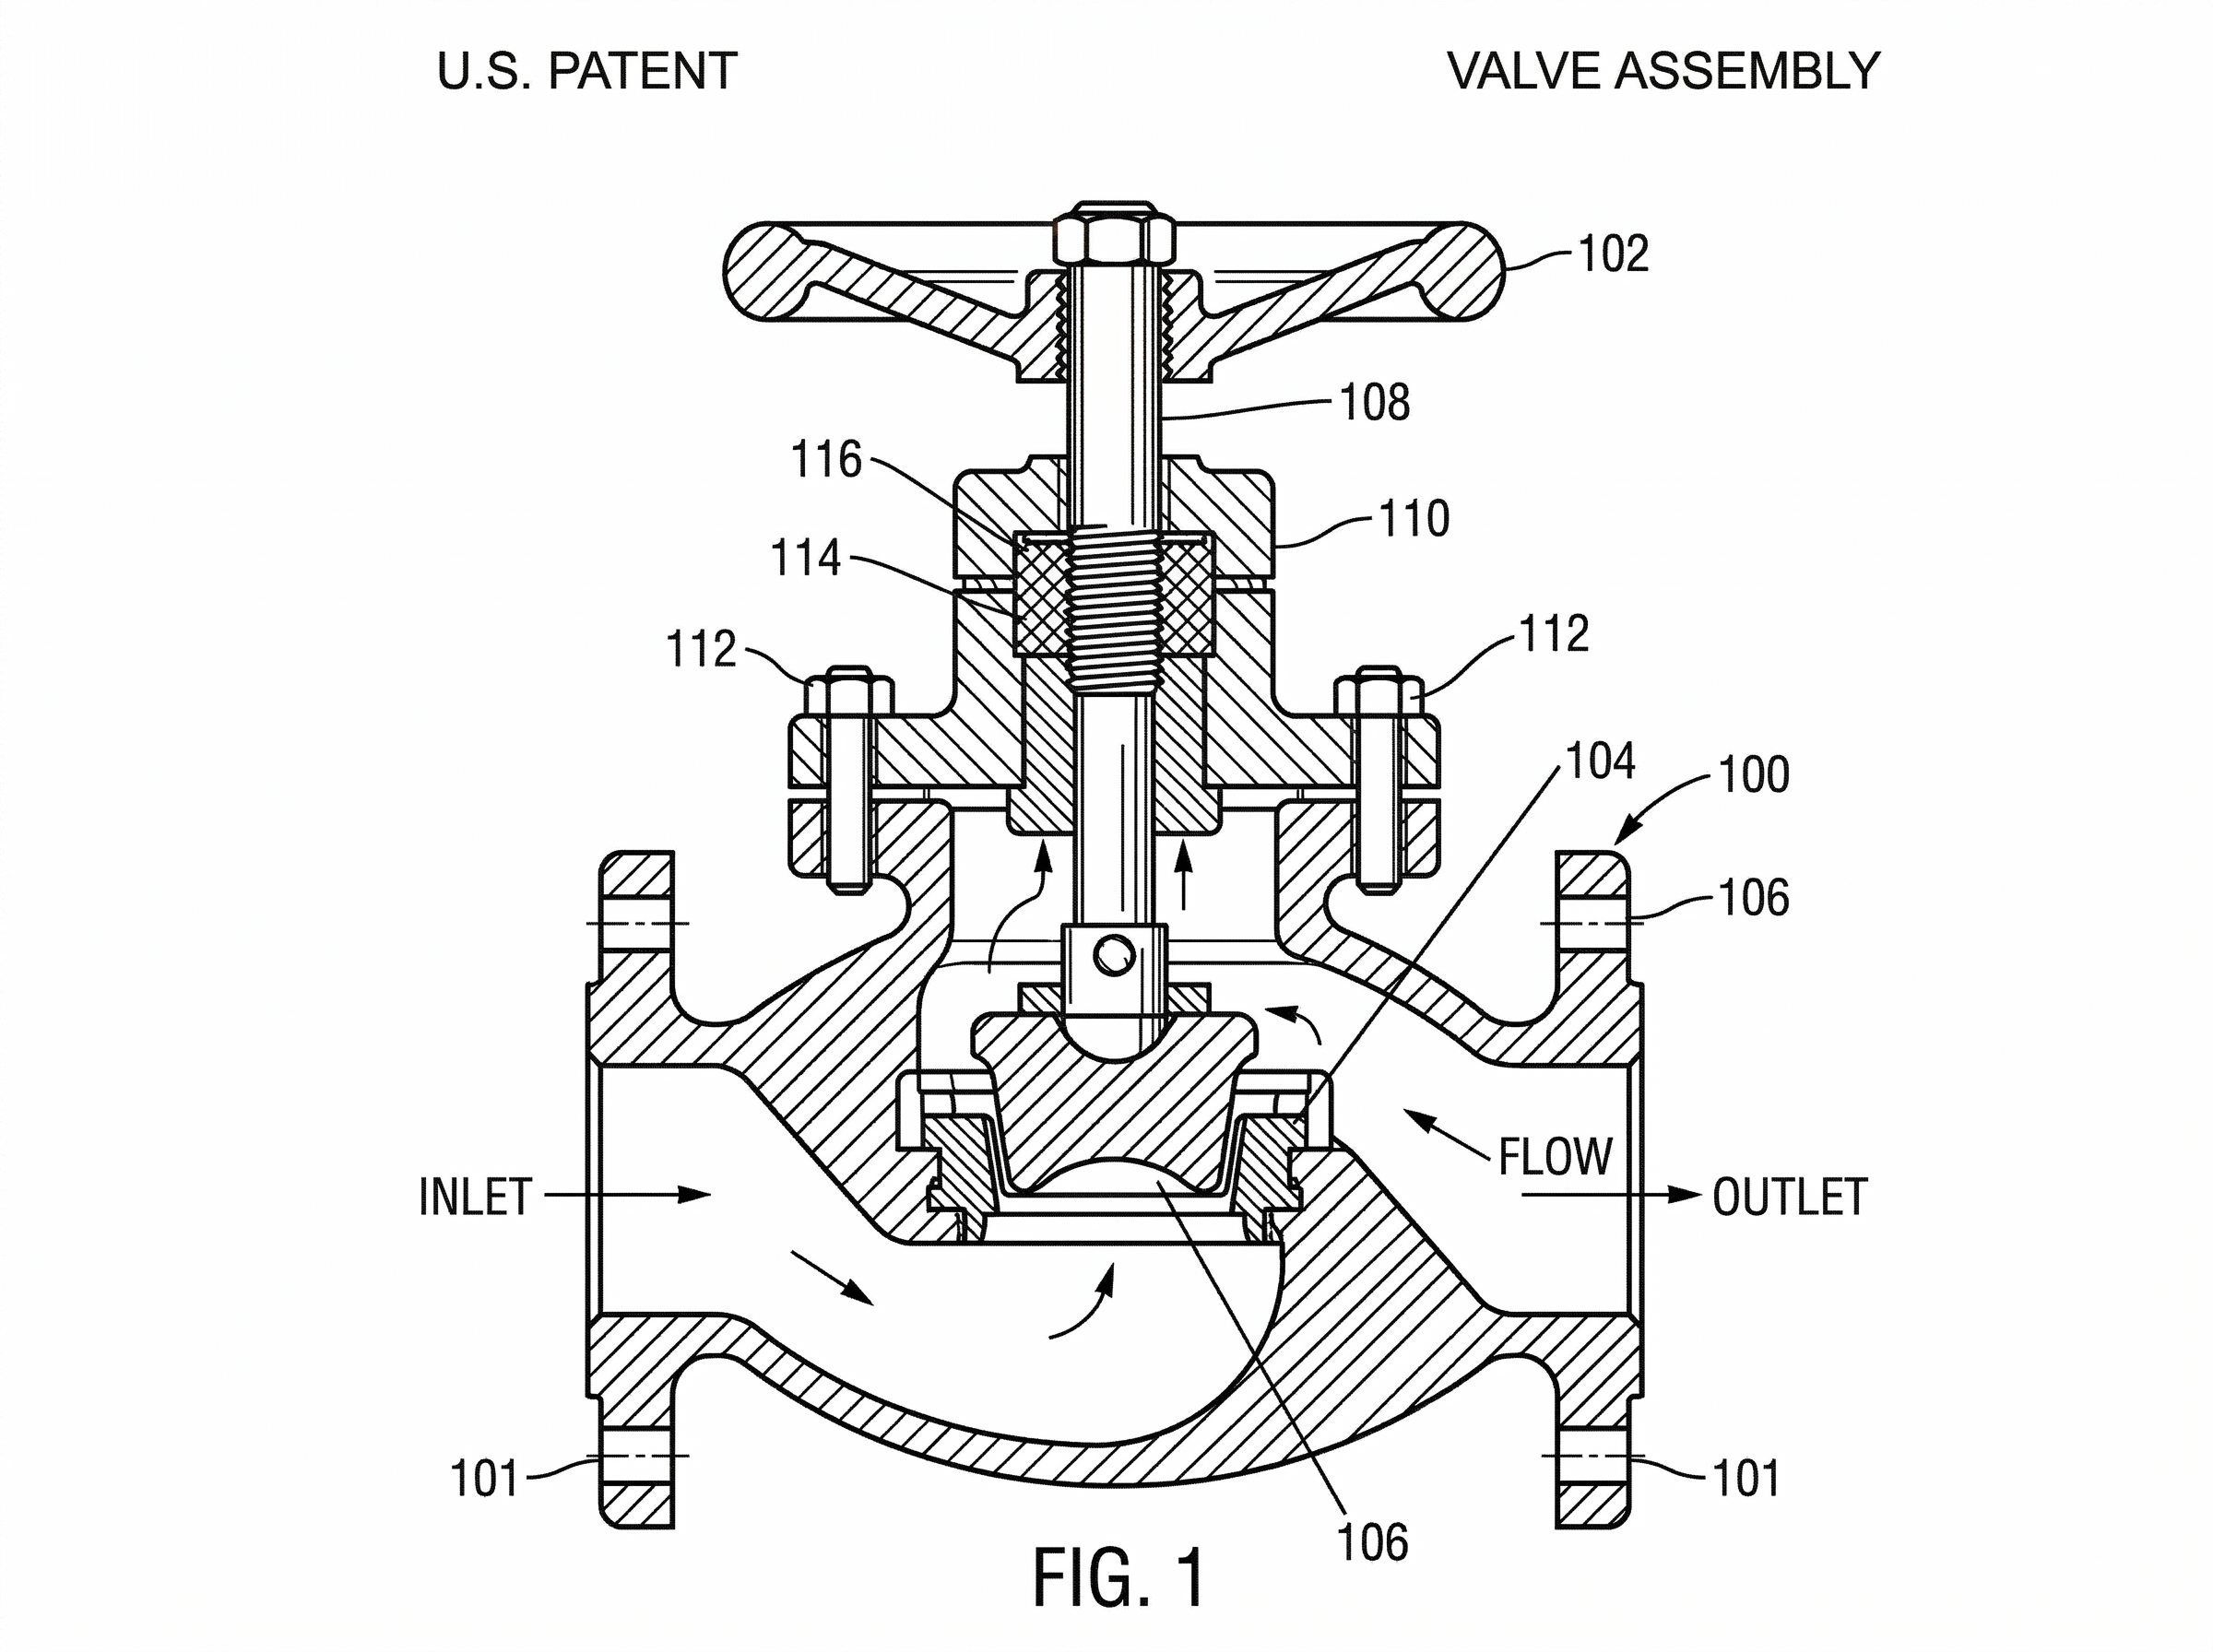
TL;DR: USPTO drawings live or die by 37 CFR 1.84: uniform solid-black lines, margins of 2.5 cm top/left and 1.5 cm/1.0 cm right/bottom, reference numerals at least 3.2 mm (1/8 inch) tall, and part numbering that stays consistent across every figure and the specification. The mistakes that trigger most Office Actions are crossed lead lines, inconsistent numbering, low-resolution exports, cluttered views, and out-of-proportion elements. For the quick checklist version, see the patent drawing requirements page.
Mastering USPTO Patent Drawing Requirements: A Guide to Compliant, High-Speed Figure Workflows
In the world of intellectual property, a picture isn't just worth a thousand words—it’s worth the strength of your patent claims. While the written description provides the legal boundaries, the drawings are often what a patent examiner relies on to truly understand the invention’s structural and functional nuances.
Filing non-compliant drawings is one of the most common reasons for receiving a "Notice to File Corrected Application Papers." These delays don't just stall your priority date; they increase the total cost of prosecution. Achieving USPTO compliance requires a meticulous balance of technical precision and artistic clarity.
Need compliant patent figures faster? Try PatentFig AI in the generator.
Essential USPTO Drawing Standards (37 CFR 1.84)
The USPTO is incredibly specific about how figures must look. These rules, codified in 37 CFR 1.84, are designed to ensure that drawings can be easily reproduced, scanned, and read across digital and print formats.
Key requirements include:
- Line Weights and Types: Lines must be uniform, black, and sufficiently dense. Blurred or "gray" lines are often rejected. Hidden features should be represented by dashed lines, while projection lines should be avoided unless necessary for clarity.
- Margins: Every sheet must follow strict margin rules (Top: 2.5cm, Left: 2.5cm, Right: 1.5cm, Bottom: 1.0cm). Figures cannot bleed into these "dead zones."
- Shading and Hatching: Sectional views must use oblique hatching to indicate different materials or parts. Surface shading is encouraged to show the contour of 3D objects, provided it doesn't obscure the line work.
- Text and Numbering: Reference characters (the numbers pointing to parts) must be at least 3.2mm (1/8 inch) tall. They should be clear, sans-serif, and never oriented horizontally if the rest of the drawing is vertical.
Top 5 Common Mistakes in Patent Figures
Even experienced IP teams run into pitfalls during the drafting phase. Avoiding these five errors can significantly reduce the likelihood of an Office Action:
- Poor Lead Line Placement: Lead lines (the lines connecting a number to a part) should be straight or slightly curved, never crossing each other. They must start near the number and end with a clear touchpoint on the part.
- Inconsistent Numbering: If Figure 1 labels a widget as "10," that widget must be "10" in every subsequent figure. Inconsistencies between the drawings and the written specification are a red flag for examiners.
- Insufficient Resolution for Digital Filings: With the shift to EFS-Web and Patent Center, low-resolution JPEGs converted to PDF often result in "stair-stepping" or pixelation. The USPTO requires high-contrast, high-resolution line art.
- Cluttered Views: Trying to cram too much information into a single sheet often leads to text overlapping with lines. It is always better to add an "exploded view" or a "magnified view" (e.g., FIG. 1A) than to submit a crowded drawing.
- Incorrect Scale: Elements within a figure must be in proportion to each other. While you don't need a scale bar, the relative size of components must be consistent across different views (top, side, perspective).
Accelerating Production with AI-Powered Workflows
Traditionally, patent drawings required a hand-off between the attorney and a professional draftsperson—a process that could take days or weeks of back-and-forth. For many IP operations teams, this remains the biggest bottleneck in the filing pipeline.
PatentFig AI is changing this dynamic by bridging the gap between rough conceptual sketches and USPTO-ready line art. By leveraging AI-driven generation, PatentFig AI allows engineers and attorneys to convert CAD screenshots, whiteboard drawings, or even descriptive prompts into clean, compliant figures in a fraction of the time.
Instead of waiting for a drafting firm to return a first draft, teams can use PatentFig AI to:
- Standardize line weights and styles automatically.
- Ensure text sizes and fonts meet 37 CFR 1.84 standards.
- Generate multiple perspectives of an object from a single source image.
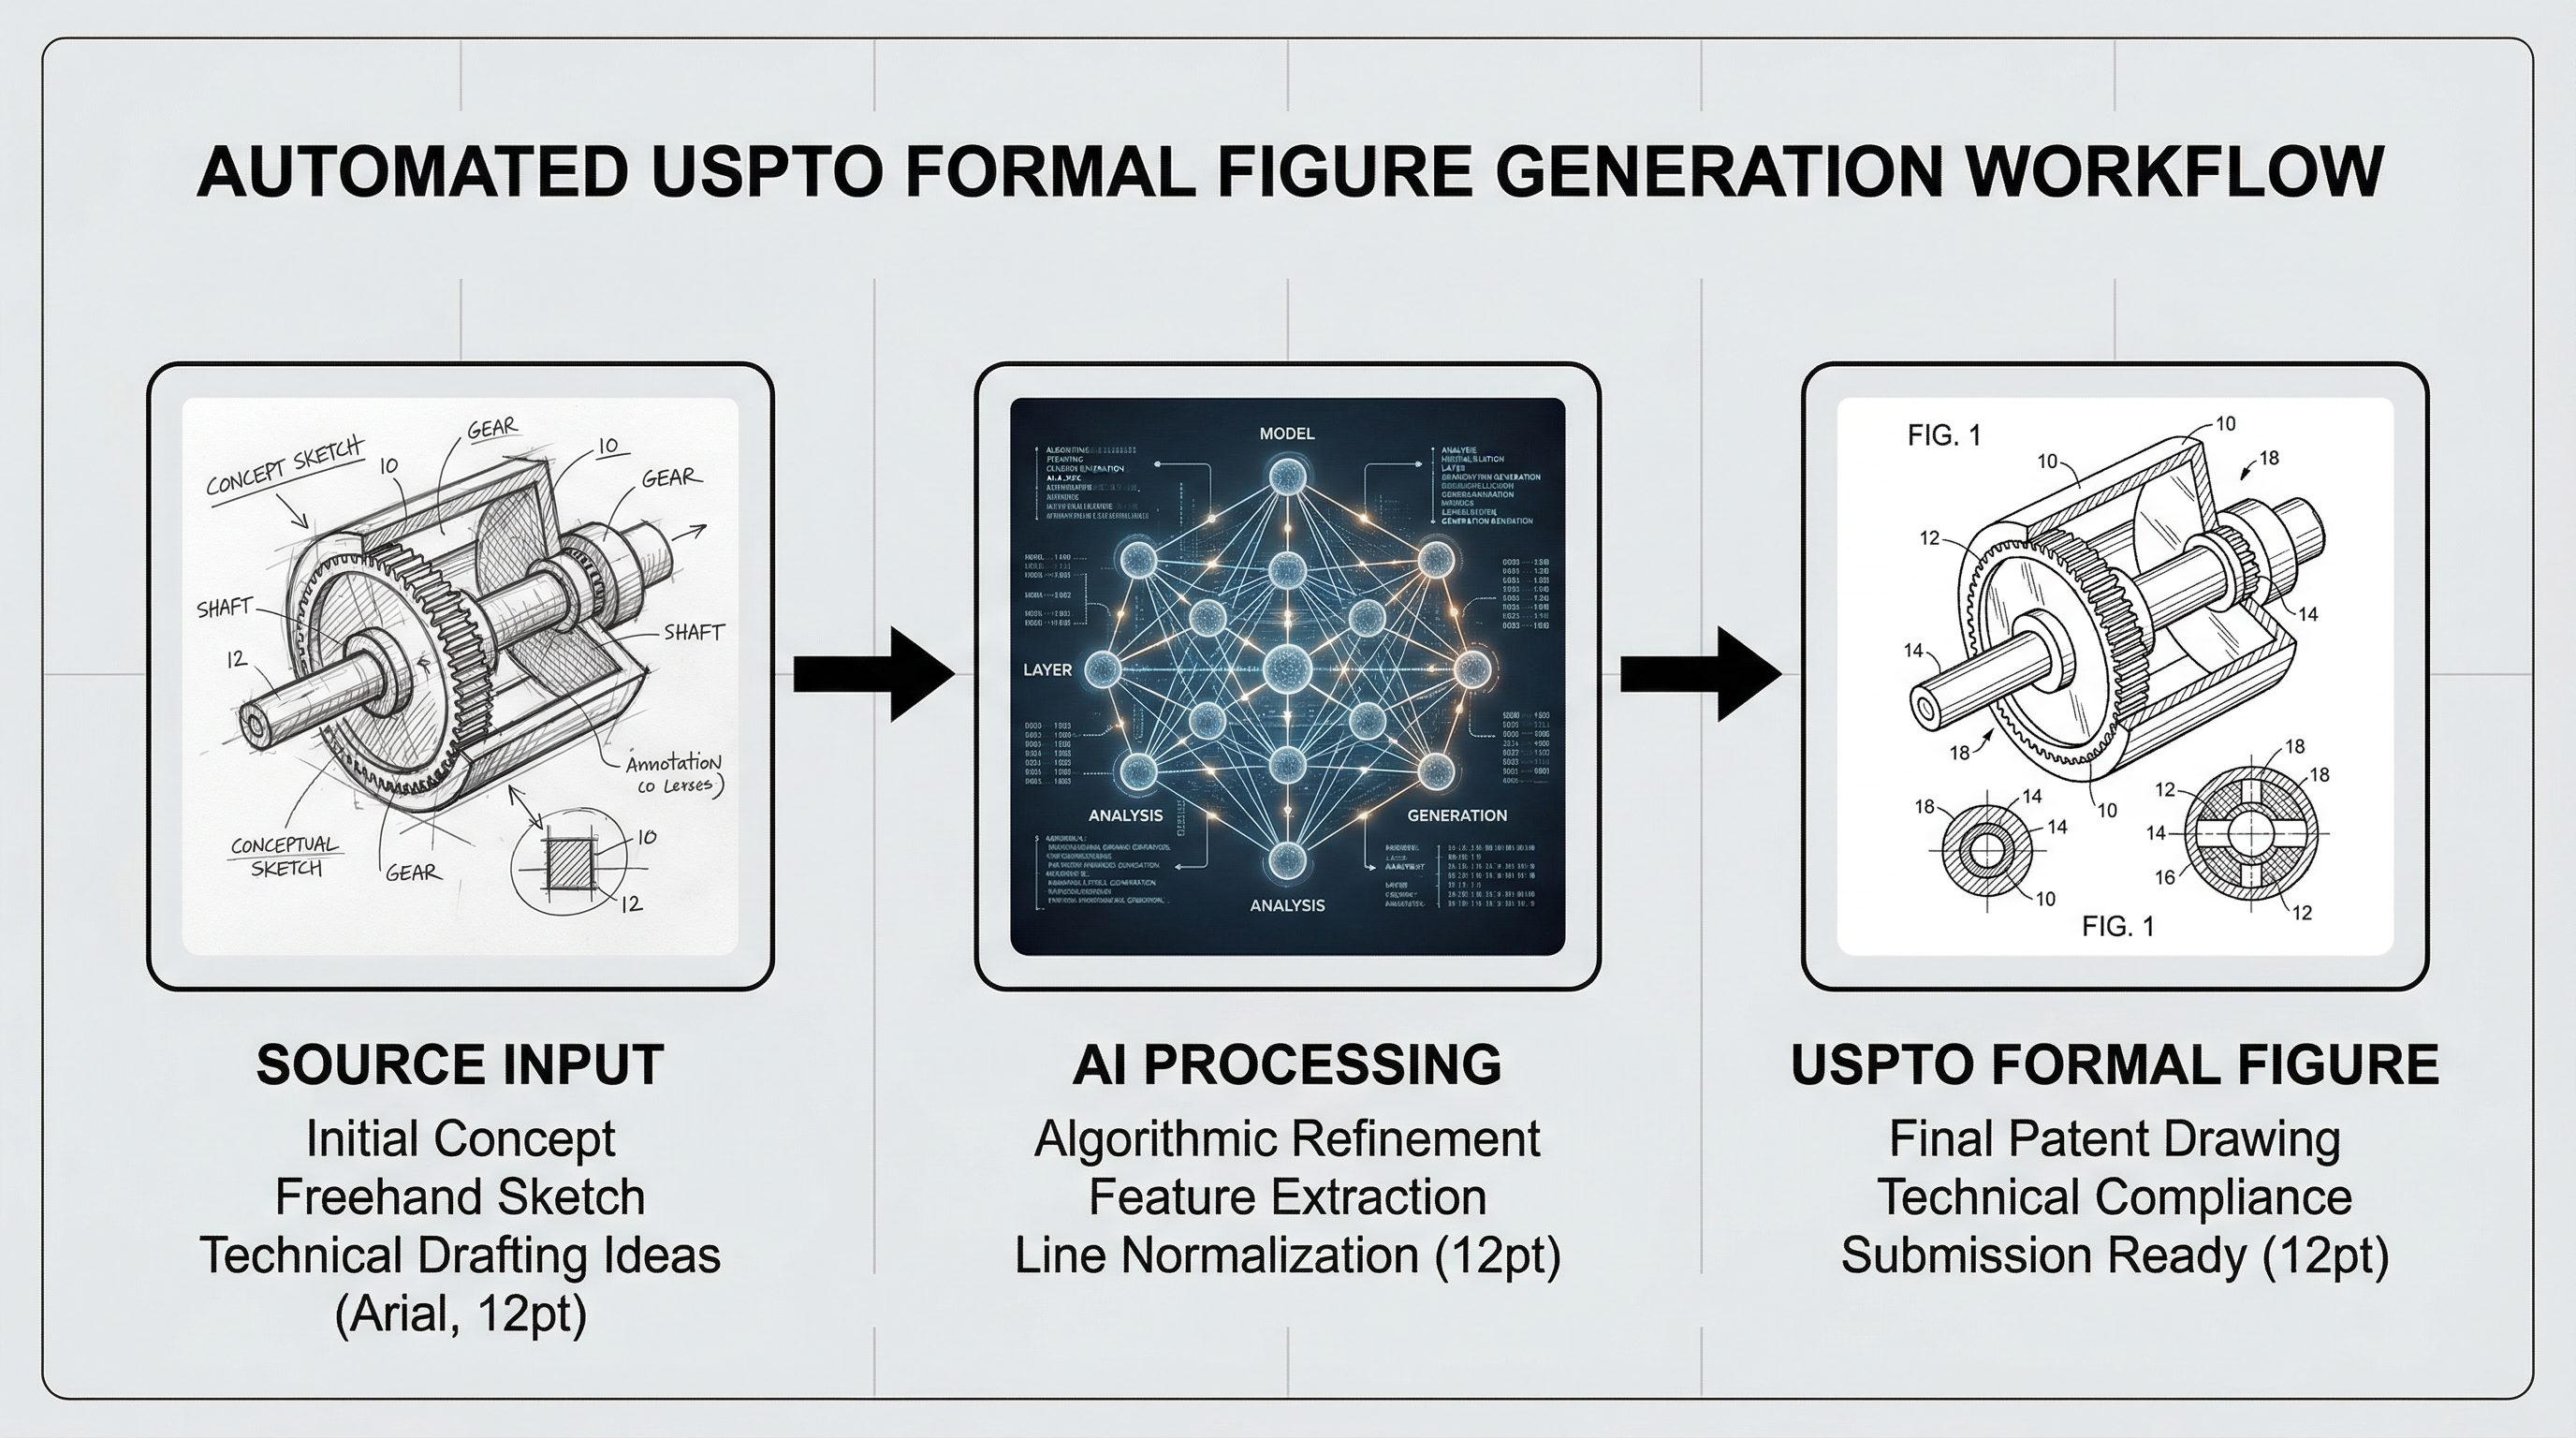
This workflow doesn't just save time; it ensures that the "visual language" of the patent remains consistent throughout the entire application, reducing the manual labor involved in polishing drafts.
Compare USPTO with Other Offices
If your filing program extends beyond the United States, use these office-specific guides to understand where drafting expectations begin to diverge:
- Patent Drawing Requirements by Office
- CNIPA patent drawing standards
- EPO patent drawing requirements
- PCT patent drawing requirements
Final Checklist for Patent Figure Readiness
Before you hit "submit" on your next filing, run your figures through this final quality control checklist:
- Legibility: Are all reference numbers at least 3.2mm high?
- Contrast: Are the lines solid black on a pure white background? (No gray gradients).
- Consistency: Does every part number match the description in the specification?
- Margins: Do all elements sit within the required 2.5cm top/left and 1.5cm/1.0cm right/bottom boundaries?
- Flow: Are the figure numbers (FIG. 1, FIG. 2, etc.) clearly labeled and placed at the bottom center or top center?
- Shading: Is surface shading used effectively to show depth without cluttering the view?
By mastering these requirements and integrating modern tools like PatentFig AI into your workflow, you can move from "invention disclosure" to "filed application" faster, with the confidence that your drawings will stand up to USPTO scrutiny.
Create Patent Figures Faster
Ready to turn rough sketches, CAD screenshots, or prompts into patent-ready visuals? Open the PatentFig AI generator.
Next step: Run your figures through the free figure checker before you file — it validates margins, line weight, DPI, and numerals against your target office. Or review the patent drawing requirements summary.
Author

Categories
More Posts

USPTO Patent Drawing Requirements 2026: Checklist, Margins & Examples
USPTO patent drawing requirements for 2026: 37 CFR 1.84 checklist, margins, line rules, reference numerals, examples, and pre-filing checks.

Common Patent Drawing Mistakes That Slow Down Filing
The recurring failure modes in patent drawings — line weight, numerals, views, color mode, extraneous matter — with the rule that catches each and the fix that ships fastest.

Patent Drawing Margin Rules: USPTO, EPO, PCT, CNIPA, JPO, KIPO
Sheet size, top, bottom, left, and right margin requirements for patent drawings across USPTO, EPO, PCT, CNIPA, JPO, and KIPO, with a practical pre-export check.
Newsletter
Join the community
Subscribe to our newsletter for the latest news and updates